Image Map

Otago Wildlife Photography Exhibition


Hi all,

I recently entered the Otago Wildlife Photography Exhibition with this 'Hawk Flight' photo I took in March this year. My family and I travelled 4 hours to Dunedin to get to the opening of the exhibition. The exhibition is held in the Otago Museum and runs until 12 October 2014, showcasing 1,189 photographs in total.

The opening and awards ceremony was held on Wednesday 28th May. I ended up winning two prizes - Winner of the Animal Category, and the 15th Anniversary Special prize; I was surprised and amazed to win these awards, I thought all the other entries were stunning. The overall prize winner went to Murray McCulloch with his beautiful 'Flower refraction' macro photograph.

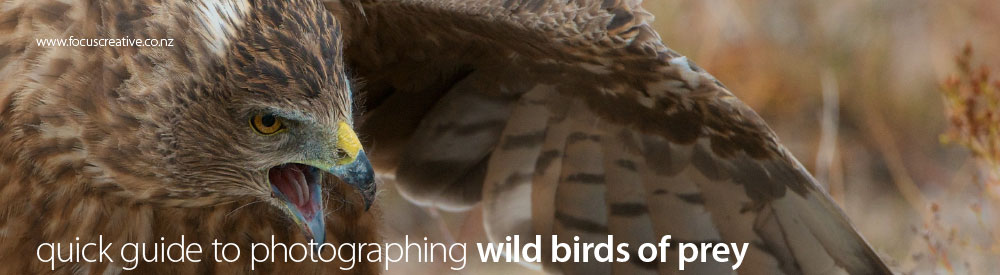
The most common question I was asked once the exhibition was opened, was "How did you achieve this shot?". Well, the key is patience, or stubbornness in my case! Waiting in the hide for hours without making a sound is the only way to get these very nervous birds to land. They soar around checking for any suspicious sounds or movement before they will land, once one arrives then others will see them feeding and come in to have their turn. In this picture the darker hawk was already on the ground feeding on a dead rabbit when another older bird decided to attack. They don't like sharing and the birds end up fighting, the younger bird managed to flip over on it's back in an instant to defend it's kill from the attacker. This all happened in an instant and I was just firing pictures as faster as I could hoping that one might be in focus and capture the action, I got very lucky with this shot!

I felt very surprised and honoured to win these awards, considering my picture was taken in my back garden, and some of the entries were taken as far away as Africa and Alaska! If you are in the area, i'm sure you would love to go and see the exhibition.

Thanks for visiting,
Simon

you can check out my 'how to take a hawk photo' tutorial here.

Lens performance cheat sheet

Tried to come up with a quick and easy way to check lens performance in the field. This is just a quick visual guide to help optimise settings for a given situation, for example if you are doing astrophotography you want to have the lowest chromatic aberration, this causes causes purple fringing around points of light. Also interesting to see the variations in performance through the zoom range of the 24-70mm Tamron...

Quick Guide to Digital Image formats


1–bitmap images e.g. photographs 
Bitmaps are made of many tiny dots, or pixels, each a different tone or colour. When a camera or scanner’s sensor is exposed to light it registers the light at each point and gives it a number to describe its location, colour and tone. These numbers can then be translated back into an image by a computer screen or printer.

bitmap resolution. More pixels mean more detail, but uses more memory to store the extra data. Bitmap resolution can be measured in pixels per inch–ppi (or dots per inch–dpi). Another common way to measure image resolution is the area of an image in pixels, e.g. 3,000 pixels wide x 2000 pixels high =  6,000,000 pixels which is commonly shortened to 6 Mega Pixels (6MP).

bit depth. A ‘bit’ is a binary digit; 1 or 0. Bit depth is the number of bits used to record the colour of a pixel. 1 bit can record black or white (recorded as 1 or 0). 24 bit (or 24 binary digits)  can record 16,777,216 colours! So more bit depth can show more detail, but again uses more memory to store the extra data. 

Compression. For images with lots of detail you need lots of pixels which makes larger files. Storing and displaying large images on the internet is slow so we compress the data. This usually means some data will be lost and we need to balance compression with image quality. JPG is the most common compression. 

hi res image printing you need files that are 300dpi at 100%, e.g. to print an image at A4 size it needs to be 21 x 29.7cm at 300dpi. This equates to 2480 x 3508 pixels or 8.7MP. An uncompressed file at this size uses 30MB of data. Compressed as a JPG with quality set at 10 uses 2MB, and at a quality setting of 4 uses 0.5MB. You can see that file size is not a good guide to resolution.

hi res images on screen you need files that are 72dpi at 100%, e.g. to display a landscape image full page on a website it needs to be about 1000 x 650 pixels at 72dpi or 0.65MP. An uncompressed file at this size uses 1.8MB of data. Saved as a JPG with quality set at 10 uses 0.5MB, and at a quality setting of 4 uses 0.2MB. You can see that file size is not a good guide to resolution.

Bitmap file formats To retain the maximum detail you should use the native file format of your software, e.g. Photoshop uses ‘PSD’ files, which is ‘lossless’ so will always keep all your data but makes big files. To store or share files you should use a format that will compress them, like JPG which is ‘lossy’, each time you open and save the file you will lose a bit more data. At a quality setting of ‘10’ JPGs will be much smaller than native files.

2–vector images e.g. logos
made with lines that define a shape containing colour. You can draw a shape by defining corner points and curves using software like Adobe Illustrator. Lots of shapes can be drawn to kane an image. The vector file saves the data for each point and curve and what colour the shape is filled with, so a large area can be recorded using much less data.

vector resolution vector files have no ‘resolution’ as they contain only data describing the location of points relative to each other and what colour fills the shape made. It is irrelevant if the points are 1mm apart or 200m apart the data is the same and a smooth line will always join the points together, resulting in a sharp image at whatever size it’s used. 

vector file formats usually depend on the software used to create them, Illustrator saves ‘AI’ files, Corel Draw saves ‘CDR’ files. Another common format is EPS which is compatible with a wider range of software.

RGB or CMYK
All screens (TV/Computer/mobiles) and photographic printers use RGB (Red Green Blue) to recreate images. 


Offset printers (magazine/books/ postcards) use CMYK (Cyan Magenta Yellow Black) inks. This applies to both bitmap and vector images.

Warbirds Over Wanaka photo experiment


Tried an experiment at the Warbirds Over Wanaka air show this weekend, a multiple exposure to try and show the number of aircraft involved. So this is a selection of 100 photos from 1500 taken on a tripod throughout the day. See more pics in my gallery.

Wanaka Art Society Easter Exhibition Entries


Gathered together a set of star trail images for the Wanaka Art Society Easter Exhibition. Quite pleased with how they turned out, they involve a lot of hard work taking hundreds of long exposure images through the night. The one on the right was shot high up in the Pisa ranges during a very cold night. I wasn't expecting so much snow and had to dig down to pitch my tent for the night, when I woke up my water bottle that had been inside my tent was frozen solid, I must be mad!

Quick Guide to photographing star trails

Welcome to the first of what I hope will become a useful series of 'Quick Guides'. I have had a few requests for help with various aspects of photography, design and software that I have a bit of experience with and it seemed the best way to share this information was to create these 'quick guides'. They are by no means meant to be definitive but are intended to give you a solid starting point to get out there and have a go yourself.
The first is a guide on photographing star trails, you should be able to download and print off the guide here and take it with you for reference.
Please let me know how you get on, shout with any suggestions or corrections and have fun! Please checkout my gallery to see some example star trails I have made.


location
compass to get the centre of the star trails you need to know roughly where North and South is.
compose image foreground interest is good
temperature if it gets too cold your lens will fog up. I use chemical hand warmer pouches strapped to the lens.
minimise light pollution from towns, roads, airports etc.
clear skies check your local weather service for cloud cover.
moon a full moon is great for lighting up the landscape for more interest, but it will also make less stars visible.

tripod
set as low as possible don’t knock it in the dark! I have knocked the tripod without knowing and ruined a nights shoot. I’ve also managed to shoot a full night completely out of focus... arty!

DSLR camera settings

shutter mode manual
shutter speed manual 30 second
f2.8 or the largest aperture available
ISO 1000. Increase ISO if you have a slower lens
file format jpg raw files add too much extra work
Long exposure noise reduction off
set camera to automatically shoot pictures to set Nikon interval timer shooting;
1 press ‘menu’ and select the ‘shooting menu’
2 scroll to ‘interval timer shooting’
3 select ‘start time’’ and set to about 5 minutes ahead.
4 now set the ‘interval’ to 00:00’ 33”
5 set the number of shots to 999x1 = 0999 and select ‘on’

lens
as wide and fast as possible
manual focus to infinity
double check focus before you shoot

process
the longer you shoot the longer the star trails
stack images and set layers to lighten using editing software like Photoshop
1 open photoshop and go to file/scripts/load files into stack
3 click ‘browse’ and select the first 50 files only, click ‘load’
4 select all resulting layers and set layers to ‘lighten’
5 flatten image and repeat with the next 50 photos
6 copy and paste resulting images into one photoshop file, set layers to lighten and flatten image.

checklist
camera with charged batteries
plenty of card storage
tripod
lens & warmer system
compass
torch
warm clothes
check moon phase
check weather

Quick Guide to photographing wild birds of prey

Hi all and welcome to my second 'quick guide'. You can download and print a free pdf herePlease check out my gallery to see examples of my wildlife photographs.

location
hide position upwind so hawks land facing you
tripod set as low as possible and use a ball head. 
bait bunnies, rodents etc. laid belly up 5-15m from hide 
large open area hawks need a bit of space to feel secure enough to land 
autumn is the best time of year. Hawks pair up in winter and raise chicks in spring/summer 
time of day doesn’t seem to matter 

camera settings
Camera settings depend on what the birds are doing. Here are suggestions for your 2 most likely needs. Use Nikon’s ‘U1’ and ‘U2’ user settings to switch between the two set ups quickly as behaviour changes. 

camera settings 1 for birds landing/fighting 
shutter mode shutter priority mode (S) 
shutter speed 1/1000 second 
shutter release high-speed continuous. This can be noisy and spook birds if used too much. 
aperture f4 
ISO auto (max 800) 
file quality raw 
metering centre spot. The bird will probably be a lot darker than the background. 

camera settings 2 once birds settle down you can switch to settings optimised for image quality. 
shutter mode aperture priority mode (A) 
shutter speed 1/500 second 
shutter release single frame release. Use quiet mode if available 
aperture f8 ISO 100 or the minimum that available light will allow 
file quality raw 
metering centre spot. The bird will probably be a lot darker than the background. 

lens 
medium to long telephoto I find 70-200mm the most useful. 
stabilisation not needed 
focus mode single centre point   

top tips 
manual focus pre-focus just behind your bait ready to catch a landing. 
flash to add a catchlight in birds eye, or fill light, risky though! 
don’t drink too much unless your hide has a toilet! 
fooling hawks Take a second person along for the walk to your location. Once you’re setup, they walk away and the hawks think it’s all clear. This works surprisingly well, even if you can’t see any hawks around, they can see you. 
keep quiet and still even in a hide 

checklist 
camera with charged batteries 
lens 
plenty of card storage 
tripod 
bait 
warm clothes